

Magento — это одна из самых популярных платформ электронной коммерции с открытым исходным кодом, которая помогает программистам создавать сайты электронной коммерции. Она написана на PHP, что позволяет создать гибкую систему корзины. Она полностью настраиваема и позволит вам разработать и запустить полнофункциональный интернет-магазин за считанные минуты. Magento предлагает бесплатную общественную и коммерческую версии, общественная версия бесплатна и предназначена для малого бизнеса, а коммерческая версия предназначена для средних и крупных компаний.
В этом руководстве мы покажем вам, как установить Magento на Ubuntu 22.04.
Установка Apache, MySQL и PHP
Сначала установите веб-сервер Apache и сервер баз данных MySQL с помощью следующей команды:
apt install apache2 mysql-server -y
Magento поддерживает только PHP версий от 7.3 до 7.4. Но PHP версии 7.4 не включен в стандартный репозиторий Ubuntu 22.04, так как в нем по умолчанию установлен PHP 8.1. Поэтому вам придется установить PHP 7.4 из репозитория PHP Ondrej.
Сначала установите необходимые зависимости с помощью следующей команды:
apt install software-properties-common -y
Затем добавьте репозиторий PHP Ondrej с помощью следующей команды:
add-apt-repository ppa:ondrej/php
После добавления репозитория обновите его и установите PHP с другими необходимыми зависимостями с помощью следующей команды:
apt update -y
apt install php7.4 libapache2-mod-php7.4 php7.4-common php7.4-gmp php7.4-curl php7.4-soap php7.4-bcmath php7.4-intl php7.4-mbstring php7.4-xmlrpc php7.4-mysql php7.4-gd php7.4-xml php7.4-cli php7.4-zip -y
Далее отредактируйте файл конфигурации PHP и измените настройки по умолчанию:
nano /etc/php/7.4/apache2/php.ini
Измените следующие значения:
file_uploads = On
allow_url_fopen = On
short_open_tag = On
memory_limit = 512M
upload_max_filesize = 128M
max_execution_time = 3600
Сохраните и закройте файл, затем перезапустите службу Apache, чтобы применить изменения конфигурации:
systemctl restart apache2
После этого можно переходить к следующему шагу.
Создание базы данных для Magento
Magento использует MySQL в качестве бэкенда базы данных, поэтому вам нужно будет создать базу данных и пользователя для Magento.
Сначала войдите в оболочку MySQL, выполнив следующую команду:
mysql
После подключения к MySQL создайте пользователя и базу данных для Magento с помощью следующей команды:
mysql> CREATE DATABASE magento2;
mysql> CREATE USER 'magento2'@'localhost' IDENTIFIED BY 'password';
Затем предоставьте все привилегии базе данных Magento2:
mysql> GRANT ALL PRIVILEGES ON magento2.* TO 'magento2'@'localhost';
Затем снимите привилегии и выйдите из MySQL с помощью следующей команды:
mysql> FLUSH PRIVILEGES;
mysql> EXIT;
Установить Composer
Composer — это менеджер зависимостей для PHP, используемый для установки зависимостей PHP, необходимых для вашего PHP-проекта.
Сначала установите инструмент командной строки Curl с помощью следующей команды:
apt-get install curl -y
Затем установите Composer с помощью следующей команды:
curl -sS https://getcomposer.org/installer -o composer-setup.php
php composer-setup.php --install-dir=/usr/local/bin --filename=composer
После установки Composer вы получите следующий результат:
All settings correct for using Composer
Downloading...

Composer (version 2.3.5) successfully installed to: /usr/local/bin/composer
Use it: php /usr/local/bin/composer
Проверить версию Composer можно с помощью следующей команды:
composer --version
Вы получите следующий результат:
Composer version 2.3.5 2022-04-13 16:43:00
Загрузка и установка Magento на Ubuntu 22.04
В этом разделе мы загрузим Magento версии 2.4.3 с помощью Composer. Для этого вам нужно будет создать ключ доступа после входа на сайт Magento. https://marketplace.magento.com/customer/accessKeys/. Как только ключ доступа будет создан, выполните следующую команду для загрузки Magento на ваш сервер:
cd /var/www/html
composer create-project --repository-url=https://repo.magento.com/ magento/project-community-edition=2.4.3 magento2
Для загрузки Magento вам будет предложено ввести свой ключ доступа, как показано ниже:
Creating a "magento/project-community-edition=2.4.3" project at "./magento2"
Warning from repo.magento.com: You haven't provided your Magento authentication keys. For instructions, visit https://devdocs.magento.com/guides/v2.3/install-gde/prereq/connect-auth.html
    Authentication required (repo.magento.com):
      Username: a6b333ad41629bac913eaabb9b8e053c
      Password:
Do you want to store credentials for repo.magento.com in /root/.config/composer/auth.json ? [Yn] Y
Installing magento/project-community-edition (2.4.3)
  - Downloading magento/project-community-edition (2.4.3)
  - Installing magento/project-community-edition (2.4.3): Extracting archive
Created project in /var/www/html/magento2
Loading composer repositories with package information
Info from https://repo.packagist.org: #StandWithUkraine
Как только Magento будет загружен, установите правильное право собственности и разрешение на каталог Magento:
chown -R www-data:www-data /var/www/html/magento2/
cd /var/www/html/magento2
find var generated vendor pub/static pub/media app/etc -type f -exec chmod g+w {} +
find var generated vendor pub/static pub/media app/etc -type d -exec chmod g+ws {} +
chown -R :www-data .
chmod u+x bin/magento
Далее выполните следующую команду для установки Magento на ваш сервер:
bin/magento setup:install --base-url=http://magento.example.com --db-host=localhost --db-name=magento2 --db-user=magento2 --db-password=password --admin-firstname=Hitesh --admin-lastname=Jethva [email protected] --admin-user=admin --admin-password=Magento@Secure1Password --language=en_US --currency=USD --timezone=America/Chicago --use-rewrites=1
Вы получите следующую ошибку:
Could not validate a connection to Elasticsearch. No alive nodes found in your cluster
Эту ошибку можно устранить с помощью следующей команды:
php bin/magento module:disable {Magento_Elasticsearch,Magento_InventoryElasticsearch,Magento_Elasticsearch6,Magento_Elasticsearch7}
Вы должны увидеть следующий результат:
The following modules have been disabled:
- Magento_Elasticsearch
- Magento_Elasticsearch6
- Magento_InventoryElasticsearch
- Magento_Elasticsearch7

Cache cleared successfully.
Generated classes cleared successfully. Please run the 'setup:di:compile' command to generate classes.
Info: Some modules might require static view files to be cleared. To do this, run 'module:disable' with the --clear-static-content option to clear them.
Также необходимо выполнить следующую команду, чтобы отключить двухфакторную аутентификацию:
sudo -u www-data bin/magento module:disable Magento_TwoFactorAuth
Вы получите следующий результат:
The following modules have been disabled:
- Magento_TwoFactorAuth

Cache cleared successfully.
Generated classes cleared successfully. Please run the 'setup:di:compile' command to generate classes.
Info: Some modules might require static view files to be cleared. To do this, run 'module:disable' with the --clear-static-content option to clear them.
Теперь снова запустите команду установки Magento, чтобы начать установку:
bin/magento setup:install --base-url=http://magento.example.com --db-host=localhost --db-name=magento2 --db-user=magento2 --db-password=password --admin-firstname=Hitesh --admin-lastname=Jethva [email protected] --admin-user=admin --admin-password=Magento@Secure1Password --language=en_US --currency=USD --timezone=America/Chicago --use-rewrites=1
После завершения установки вы получите следующий результат:
[Progress: 1359 / 1366]
Module 'Yotpo_Yotpo':
[Progress: 1360 / 1366]
Enabling caches:
Current status:
layout: 1
block_html: 1
full_page: 1
[Progress: 1361 / 1366]
Installing admin user...
[Progress: 1362 / 1366]
Caches clearing:
Cache cleared successfully
[Progress: 1363 / 1366]
Disabling Maintenance Mode:
[Progress: 1364 / 1366]
Post installation file permissions check...
For security, remove write permissions from these directories: '/var/www/html/magento2/app/etc'
[Progress: 1365 / 1366]
Write installation date...
[Progress: 1366 / 1366]
[SUCCESS]: Magento installation complete.
[SUCCESS]: Magento Admin URI: /admin_1u9o0y
Nothing to import.
Теперь очистите весь кэш и создайте задание Magento cron, используя следующие команды:
sudo -u www-data bin/magento cache:flush
sudo -u www-data bin/magento cron:install
Как только вы закончите, вы можете перейти к следующему шагу.
Настройка Apache для Magento
Далее вам нужно будет создать файл конфигурации виртуального хоста Apache, чтобы обслуживать Magento через Интернет.
nano /etc/apache2/sites-available/magento2.conf
Добавьте следующие строки:
     ServerAdmin [email protected]
      DocumentRoot /var/www/html/magento2/
     ServerName magento.example.com


          Options FollowSymlinks
          AllowOverride All
          Require all granted


     ErrorLog ${APACHE_LOG_DIR}/magento2_error.log
     CustomLog ${APACHE_LOG_DIR}/magento2_access.log combined
Сохраните и закройте файл, затем активируйте виртуальный хост Magento и модуль перезаписи Apache с помощью следующей команды:
a2ensite magento2.conf
a2enmod rewrite
Затем перезапустите службу Apache, чтобы применить изменения:
systemctl restart apache2
Вы также можете проверить состояние Apache с помощью следующей команды:
systemctl status apache2
Вы должны увидеть следующий результат:
? apache2.service - The Apache HTTP Server
     Loaded: loaded (/lib/systemd/system/apache2.service; enabled; vendor preset: enabled)
     Active: active (running) since Fri 2022-04-29 09:03:19 UTC; 2s ago
       Docs: https://httpd.apache.org/docs/2.4/
    Process: 39790 ExecStart=/usr/sbin/apachectl start (code=exited, status=0/SUCCESS)
   Main PID: 39794 (apache2)
      Tasks: 6 (limit: 4630)
     Memory: 14.1M
        CPU: 132ms
     CGroup: /system.slice/apache2.service
             ??39794 /usr/sbin/apache2 -k start
             ??39795 /usr/sbin/apache2 -k start
             ??39796 /usr/sbin/apache2 -k start
             ??39797 /usr/sbin/apache2 -k start
             ??39798 /usr/sbin/apache2 -k start
             ??39799 /usr/sbin/apache2 -k start

Apr 29 09:03:19 ubuntu systemd[1]: Starting The Apache HTTP Server...
Доступ к веб-интерфейсу Magento
Теперь откройте веб-браузер и зайдите в панель управления Magento, используя URL-адрес http://magento.example.com/admin_1u9o0y. Вы будете перенаправлены на страницу входа в систему Magento:
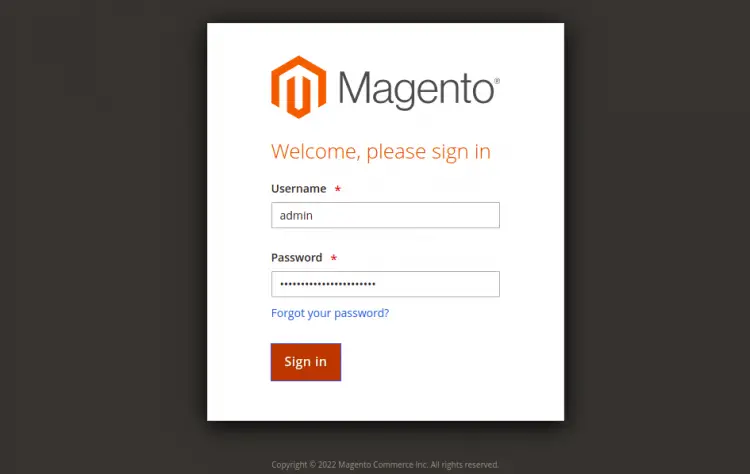
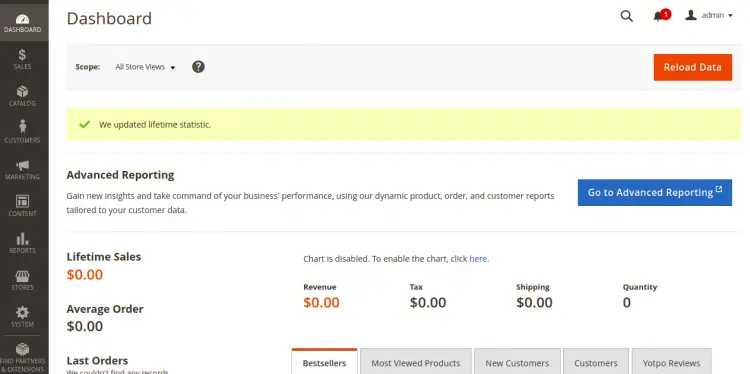
Введите свое имя пользователя admin, пароль и нажмите на кнопку Вход кнопку. Вы должны увидеть приборную панель Magento на следующем экране:
Защита Magento с помощью Let’s Encrypt SSL
Всегда полезно защитить свой сайт с помощью Let’s Encrypt SSL. Для установки и управления SSL вам потребуется установить клиент Certbot. Вы можете установить его с помощью следующей команды:
apt-get install python3-certbot-apache -y
После установки Certbot выполните следующую команду, чтобы защитить свой сайт с помощью Let’s Encrypt SSL:
certbot --apache -d magento.example.com
Вам будет предложено указать свою электронную почту и принять условия предоставления услуг, как показано ниже:
Saving debug log to /var/log/letsencrypt/letsencrypt.log
Plugins selected: Authenticator standalone, Installer None
Enter email address (used for urgent renewal and security notices) (Enter 'c' to
cancel): [email protected]

- - - - - - - - - - - - - - - - - - - - - - - - - - - - - - - - - - - - - - - -
Please read the Terms of Service at
https://letsencrypt.org/documents/LE-SA-v1.2-November-15-2017.pdf. You must
agree in order to register with the ACME server at
https://acme-v02.api.letsencrypt.org/directory
- - - - - - - - - - - - - - - - - - - - - - - - - - - - - - - - - - - - - - - -
(A)gree/(C)ancel: A

- - - - - - - - - - - - - - - - - - - - - - - - - - - - - - - - - - - - - - - -
Would you be willing to share your email address with the Electronic Frontier
Foundation, a founding partner of the Let's Encrypt project and the non-profit
organization that develops Certbot? We'd like to send you email about our work
encrypting the web, EFF news, campaigns, and ways to support digital freedom.
- - - - - - - - - - - - - - - - - - - - - - - - - - - - - - - - - - - - - - - -
(Y)es/(N)o: Y
Plugins selected: Authenticator apache, Installer apache
Obtaining a new certificate
Performing the following challenges:
http-01 challenge for magento.example.com
Enabled Apache rewrite module
Waiting for verification...
Cleaning up challenges
Created an SSL vhost at /etc/apache2/sites-available/magento-le-ssl.conf
Enabled Apache socache_shmcb module
Enabled Apache ssl module
Deploying Certificate to VirtualHost /etc/apache2/sites-available/magento-le-ssl.conf
Enabling available site: /etc/apache2/sites-available/magento-le-ssl.conf
Далее выберите, нужно ли перенаправлять HTTP-трафик на HTTPS, как показано ниже:
Please choose whether or not to redirect HTTP traffic to HTTPS, removing HTTP access.
- - - - - - - - - - - - - - - - - - - - - - - - - - - - - - - - - - - - - - - -
1: No redirect - Make no further changes to the webserver configuration.
2: Redirect - Make all requests redirect to secure HTTPS access. Choose this for
new sites, or if you're confident your site works on HTTPS. You can undo this
change by editing your web server's configuration.
- - - - - - - - - - - - - - - - - - - - - - - - - - - - - - - - - - - - - - - -
Select the appropriate number [1-2] then [enter] (press 'c' to cancel): 2
Введите 2 и нажмите Enter, чтобы установить Let’s Encrypt SSL для вашего сайта:
Enabled Apache rewrite module
Redirecting vhost in /etc/apache2/sites-enabled/magento.conf to ssl vhost in /etc/apache2/sites-available/magento-le-ssl.conf

- - - - - - - - - - - - - - - - - - - - - - - - - - - - - - - - - - - - - - - -
Congratulations! You have successfully enabled https://magento.example.com

You should test your configuration at:
https://www.ssllabs.com/ssltest/analyze.html?d=magento.example.com
- - - - - - - - - - - - - - - - - - - - - - - - - - - - - - - - - - - - - - - -

IMPORTANT NOTES:
 - Congratulations! Your certificate and chain have been saved at:
   /etc/letsencrypt/live/magento.example.com/fullchain.pem
   Your key file has been saved at:
   /etc/letsencrypt/live/magento.example.com/privkey.pem
   Your cert will expire on 2023-01-23. To obtain a new or tweaked
   version of this certificate in the future, simply run certbot again
   with the "certonly" option. To non-interactively renew *all* of
   your certificates, run "certbot renew"
 - If you like Certbot, please consider supporting our work by:

   Donating to ISRG / Let's Encrypt:   https://letsencrypt.org/donate
   Donating to EFF:                    https://eff.org/donate-le
Теперь вы можете получить безопасный доступ к своему сайту, используя URL https://magento.example.com.